I’ve known about Microsoft FastTrack for some time but not really taken advantage of the resources it offers. One of the resources are pre-created end-user communications, like posters and email messages, letting the users know about the upcoming Office 365 project.
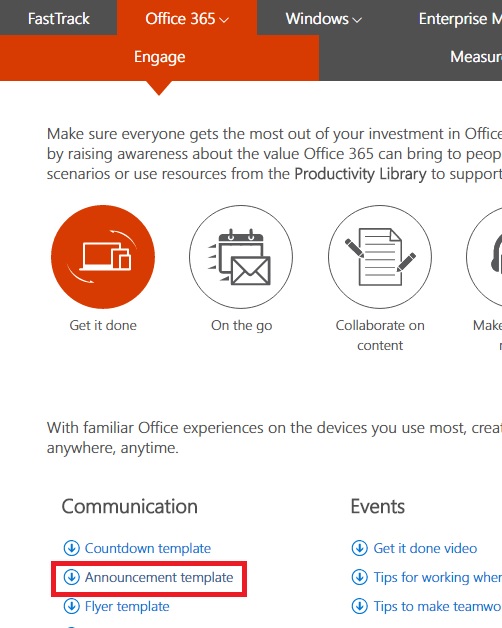
So, in my current project I thought that I would be an improved consultant and make use of the Office 365 Welcome Message that can be found on the FastTrack website located at http://fasttrack.microsoft.com In the ribbon go to Office 365 > Drive Value > Engage. You’ll find the email template at the link ‘Announcement template’
One thing I found strange at first, was that the email template was in Microsoft Word format, not an .eml format targeted for Outlook. That got me thinking about a feature I have seen other people make use of, called merged documents. Obviously there must be a way to create an email template and have Outlook populate individual data so you can mass email the migrated users and inform them of the username and password without having to manually create 2000 email messages. And as it turns out, there is, but it’s not Outlook but rather Word that makes this magic happen.
What you need:
- An Excel spreadsheet containing the values you want Word to populate
- A Word template (if you don’t want to create one yourself)
- Outlook to send the messages out. (Tip! Remember to create an Outlook-profile pointing to the Shared Mailbox you want the email message to come from as the sender.)
If we start with the Excel spreadsheet, mine is as simple as the one below. It’s important to have row 1 containing column headers. You can name these to your liking. Remember that you will reference the names in the Word document as anchor points for the data merged from the Excel document.

Save the file as a regular .xlsx workbook. Then, go into Word and open the email message template and go to ‘Mailings’ and ‘Start Mail Merge’ as seen below.

Now a new Mail Merge menu appears to the right. Select ‘E-mail messages’ and then ‘Next’ at the bottom of the menu.

In Step 2, choose ‘Use the current document’
In Step 3, choose ‘Use an existing list’ and select your Excel document created earlier. After pointing out your Excel spreadsheet, you get two dialog boxes:

Just hit ‘OK’

You have the option to alter your list here if you want to, but for now, just click ‘OK’ and in the Mail Merge menu to the right, click ‘Next.
Now it’s time to customize our email message to our liking. First thing is to remove the top notification to avoid any embarassment.

In the main section, I’d like to change these three places to merge personal data from the Excel document.

We accomplish this by going to ‘Insert Merge Field’ and choosing the correct column value. (see why row 1 should be column headers?!)

It should look something like this when you are done

When you are finished customizing, in the Mail Merge menu to the right, click ‘Next’
Now you have the chance to preview how your e-mail message will look like. Just jo back in the wizard if you’re not happy with something. When you are sure you have it the way you want it, go to Step 6 ‘Complete the merge’. You are finished! But wait, there is no e-mail being sent out? Did I miss something? Yes, you need to perform one last step to initiate the sending of the email message. Back to the ribbon and Mailings tab and click

And fill in the last things

And your users will get this butiful email message welcoming them to Office 365.

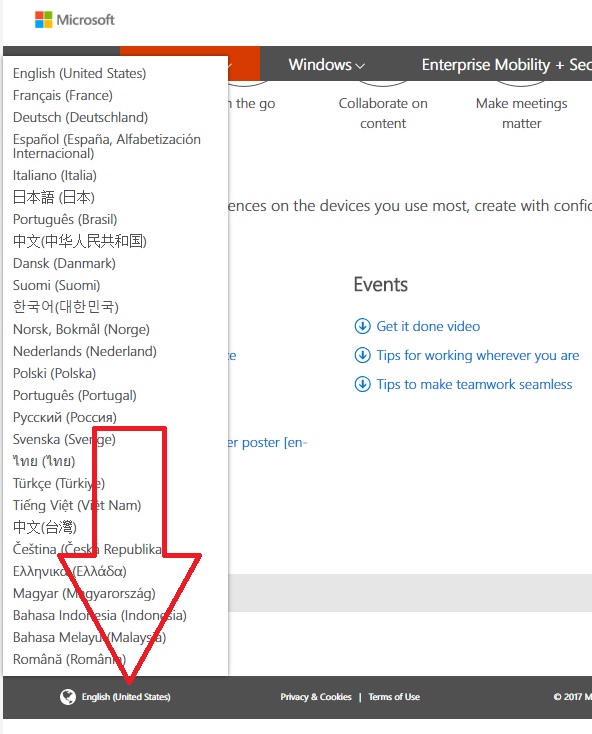
Now you might think; Well, that’s just fine and dandy for all English speaking countries, but then you are mistaken. If you go to the bottom of the FastTrack page, you can change the language to match yours, and best of all, the content language changes as well. So now you can download the email message template in your own language. Sweet!